

Creating a Google Form quiz is a great way to quickly assess your students. They give students and teachers immediate feedback. Read below for steps to create a Google Form quiz.
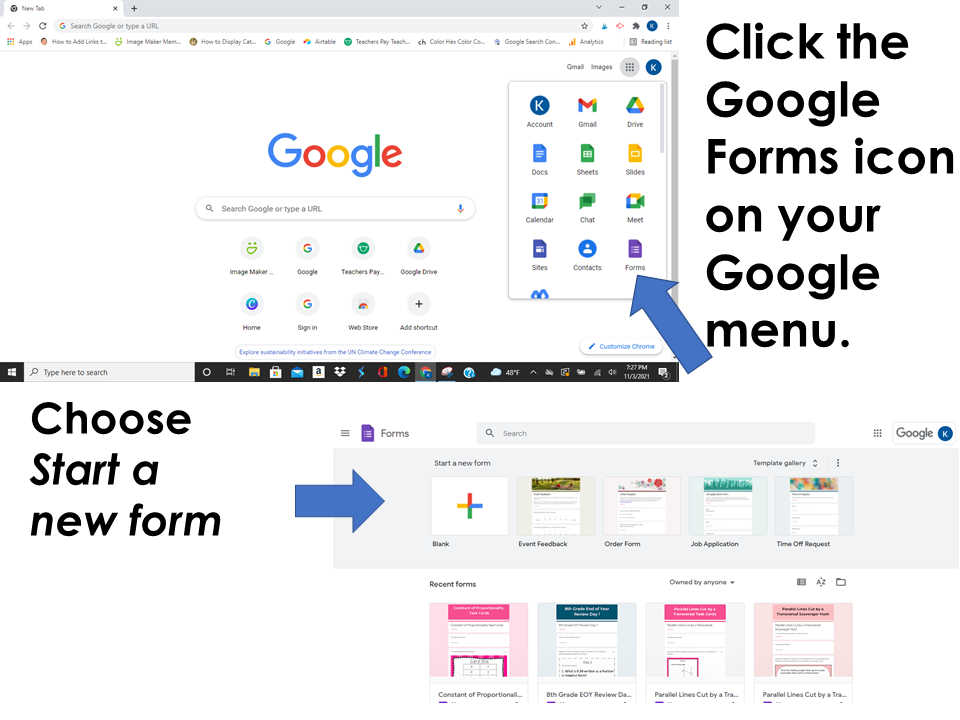
Step 1 Open a New Google Form
Go to your Google Account or your Google Drive. Choose Google Form from your Google Apps in the right-hand corner. Choose the plus sign(Start a new form). From your Google Drive choose the plus sign(new) and choose Google Form.
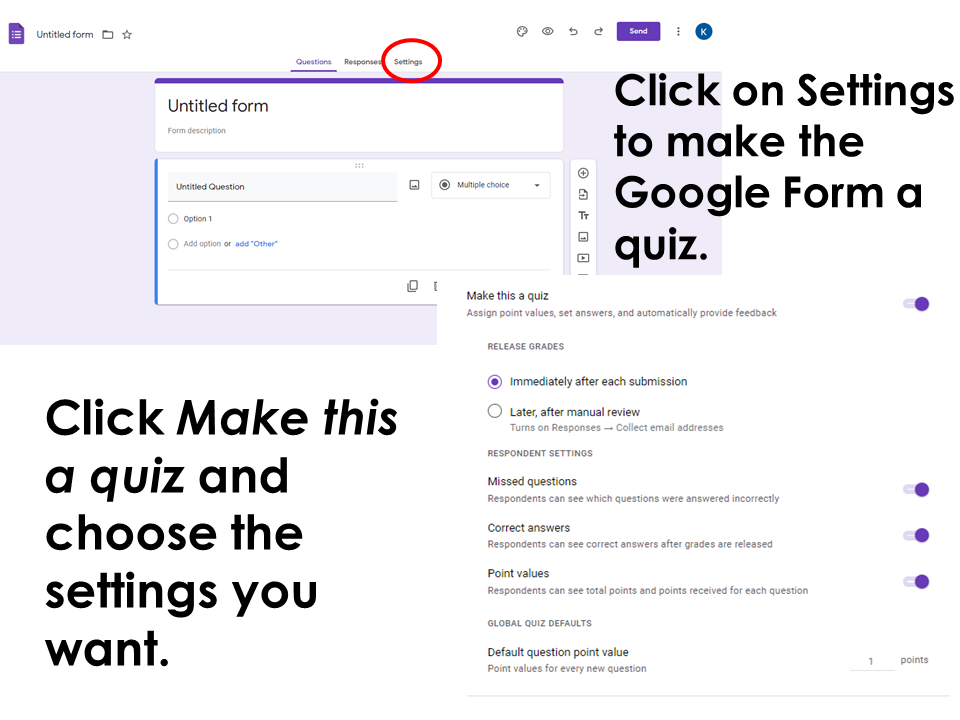
Step 2 Make the Google Form a Quiz
When the Google Form opens go to the Settings tab at the top. Click Make this a quiz. Go through and click the options you would like to have on the quiz.
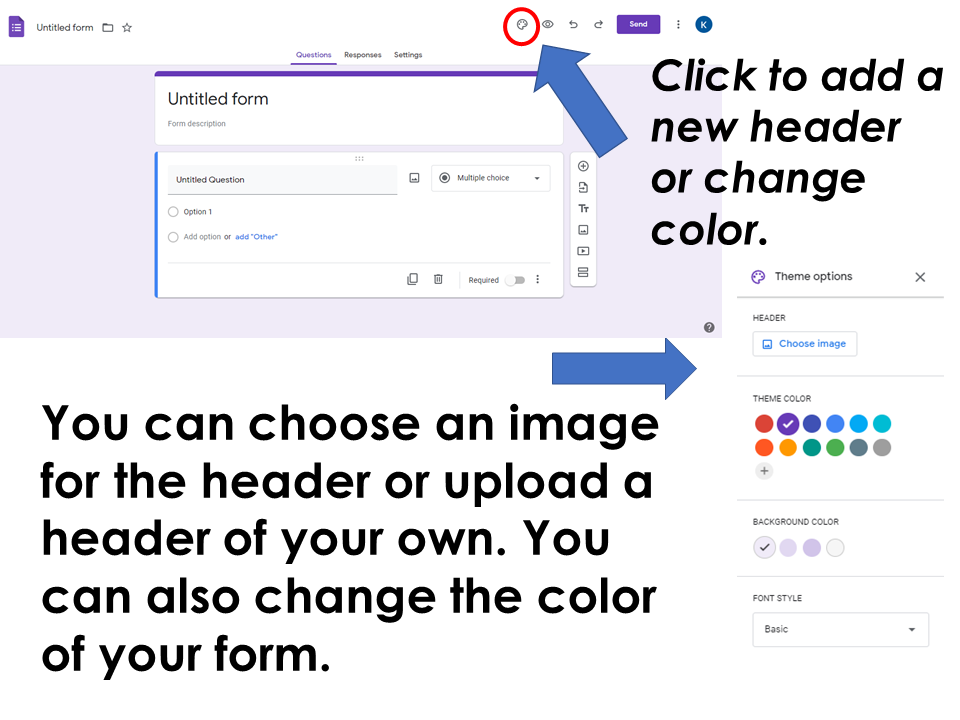
Step 3 Choose Heading and Colors
Look at the top right of the screen. Click the art palette (first icon top right). Choose a header image (Choose Image) if you would like one. You can also upload a header you have made or purchased. Choose the colors you want for the form. You can choose to leave the form the way it is. The header is optional. Type in the quiz name where it says Untitled form.
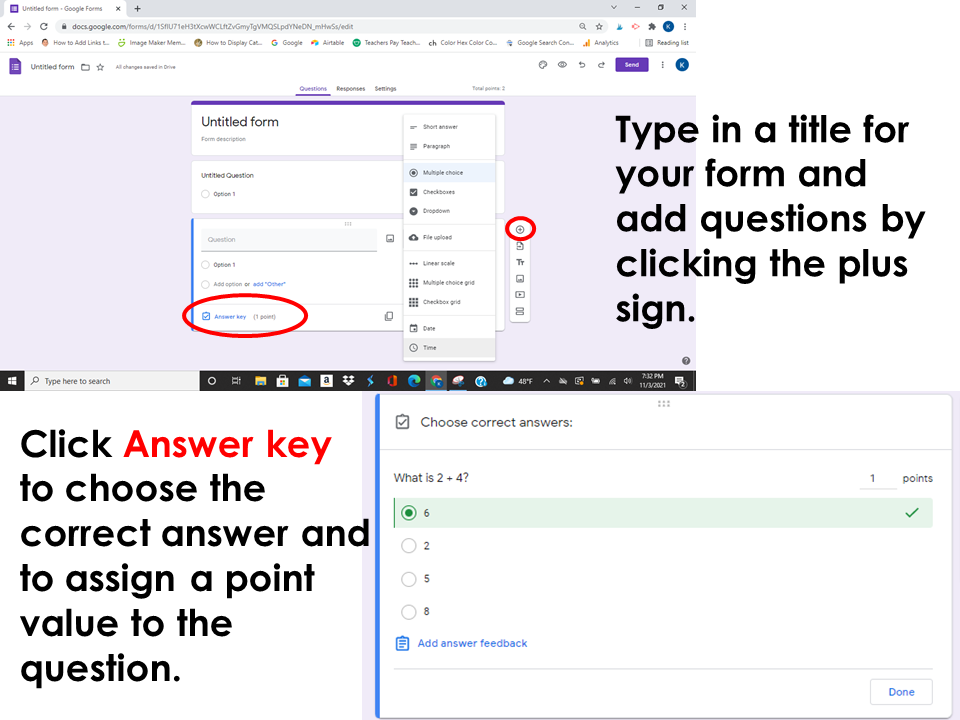
Step 4 Add Questions
Click the small plus on the right menu bar to add questions. You can choose short answer, paragraph, or multiple-choice questions. Choose the question type you want. Type in the question. Click on the picture to add an image if you want one.
Next, click on the answer key and add the correct answer. You can type in more than one answer. Be specific in the directions about how you want students to type in the answer. For example, you may put “Use numbers only. Do not use symbols.”
Click the point value in the upper right. It can be set to one point for each question. You can also change the value to a different amount.
Select “Done”. Now create your second question. Click the plus for a new question. If your question is like the previous question, you can copy it by clicking on the first icon at the bottom right of the question. Go through and add your questions and answers.
Step 5 Preview, Assign, and Look at Data
When you finish click the eye(top right) and preview the form. That way you can make sure there are no mistakes.
It is good to make copies of your Google Form before you use it. You can use one copy for all your students. If you have more than one class, you can make a copy for each class. Sometimes it is easier to look at the quiz data for each class separately. Assign the Google form using whatever system you use to assign online work.
To see student data, click Responses. You can look at student responses in several ways. This is where you can see the the problems each student got correct and incorrect. You can see the data in a spreadsheet by clicking the green plus sign. If you want to stop accepting responses from students, you can click (turn off) “Accepting responses”.
Conclusion
Using Google Forms in class can be a great tool. You can easily type in your own questions, or you can add images of questions you already have. The forms are self-grading so students and teachers can get immediate feedback. Check out our blog on Google Forms in the Math Classroom for more uses of Google Forms.
Click below to try a free Google Form on Adding and Subtracting Decimal Numbers.